
Caramel Sauce (with Salted Caramel Option)
This recipe can be made two ways: as a silky smooth Caramel Sauce, or you can try the Salted Caramel version. Whichever you choose, you’ll love the rich flavor and velvety texture. With just 4 simple, all-natural ingredients, I think you’ll agree that this beats store-bought caramel sauce any day. I also have notes on how to make it thicker for a cookie filling.
What Is Caramel Sauce Made Of?
Caramel sauce is a rich dessert topping made by melting sugar until golden, then blending in butter and cream for a smooth, glossy finish.

What is Salted Caramel Sauce?
Salted Caramel Sauce is classic caramel made by melting sugar with salted butter (or unsalted butter + 1 teaspoon of salt), along with heavy cream for a sweet-and-salty flavor balance.
Ways to Use Caramel Sauce
Caramel sauce isn’t just for spoonfuls straight from the jar…. no judgment here . 😉 This rich and buttery topping instantly elevates simple desserts into something special. Here are a few of my favorite ways to enjoy it:
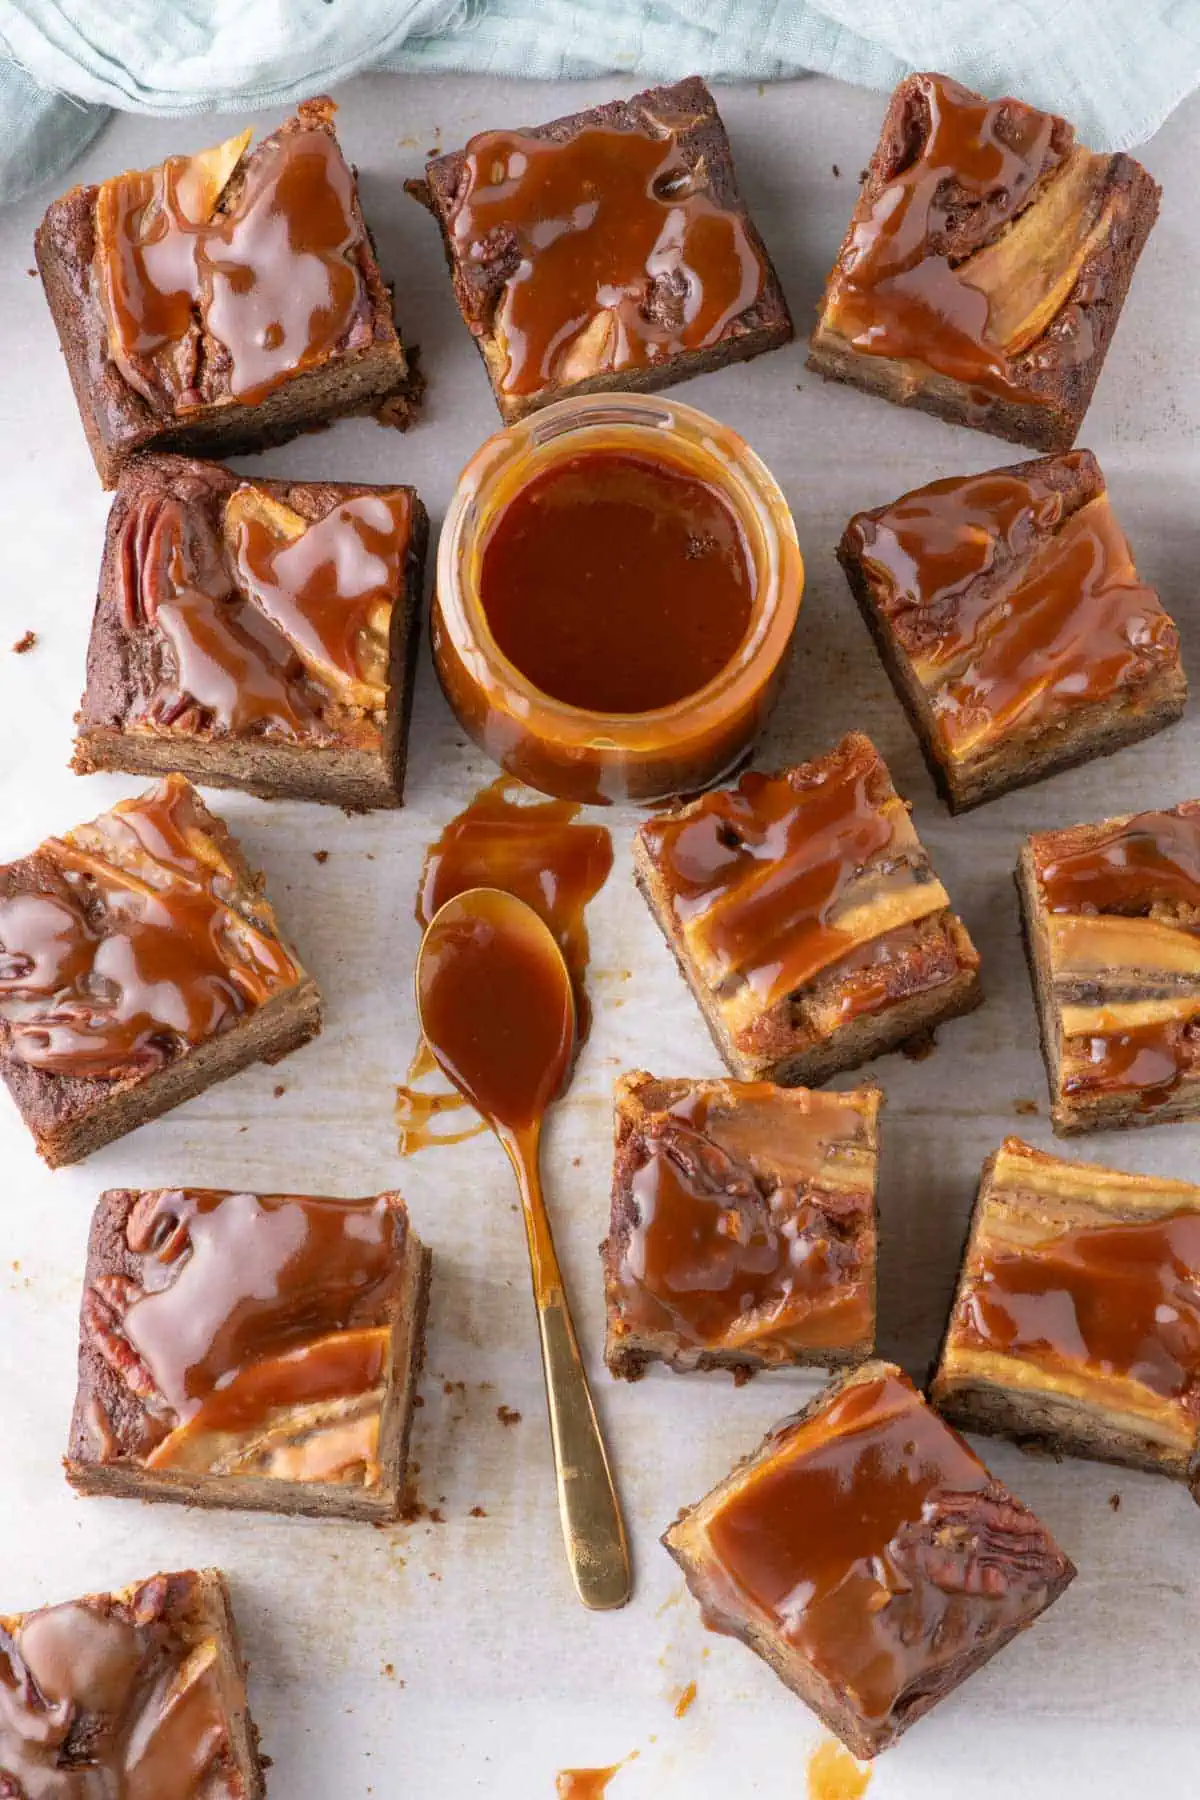
- My Banana Bread Bars with Salted Caramel Swirl are the perfect showcase for this sauce.
- Over Ice Cream or apple pie, a warm caramel drizzle is the perfect finishing touch.
- Use it as a filling in my Linzer cookies instead of jam, see note below for perfect thickness
- Spoon the caramel over my Air Fryer Peaches with Cinnamon Butter for a decadent take on this fruity dessert.
- Straight from the Spoon: Yes, it’s that good!

Table of Contents
Ingredients for Making Homemade Caramel

Granulated Sugar: The base of your caramel. Once melted, it will create a deep amber color, and rich flavor.
Unsalted Butter or Salted Butter (if you plan to make salted caramel)
Heavy Cream: Gives the caramel a pourable consistency and creamy mouthfeel.
Salt: Adds extra depth of flavor to the caramel and helps balance its sweetness.
Refer to the printable recipe card below for ingredient quantities and detailed instructions.
Step-by-Step Instructions


1. Add sugar to a saucepan over medium-low heat, stirring until it resembles sand.
2. Continue stirring until the sugar forms large molten chunks.
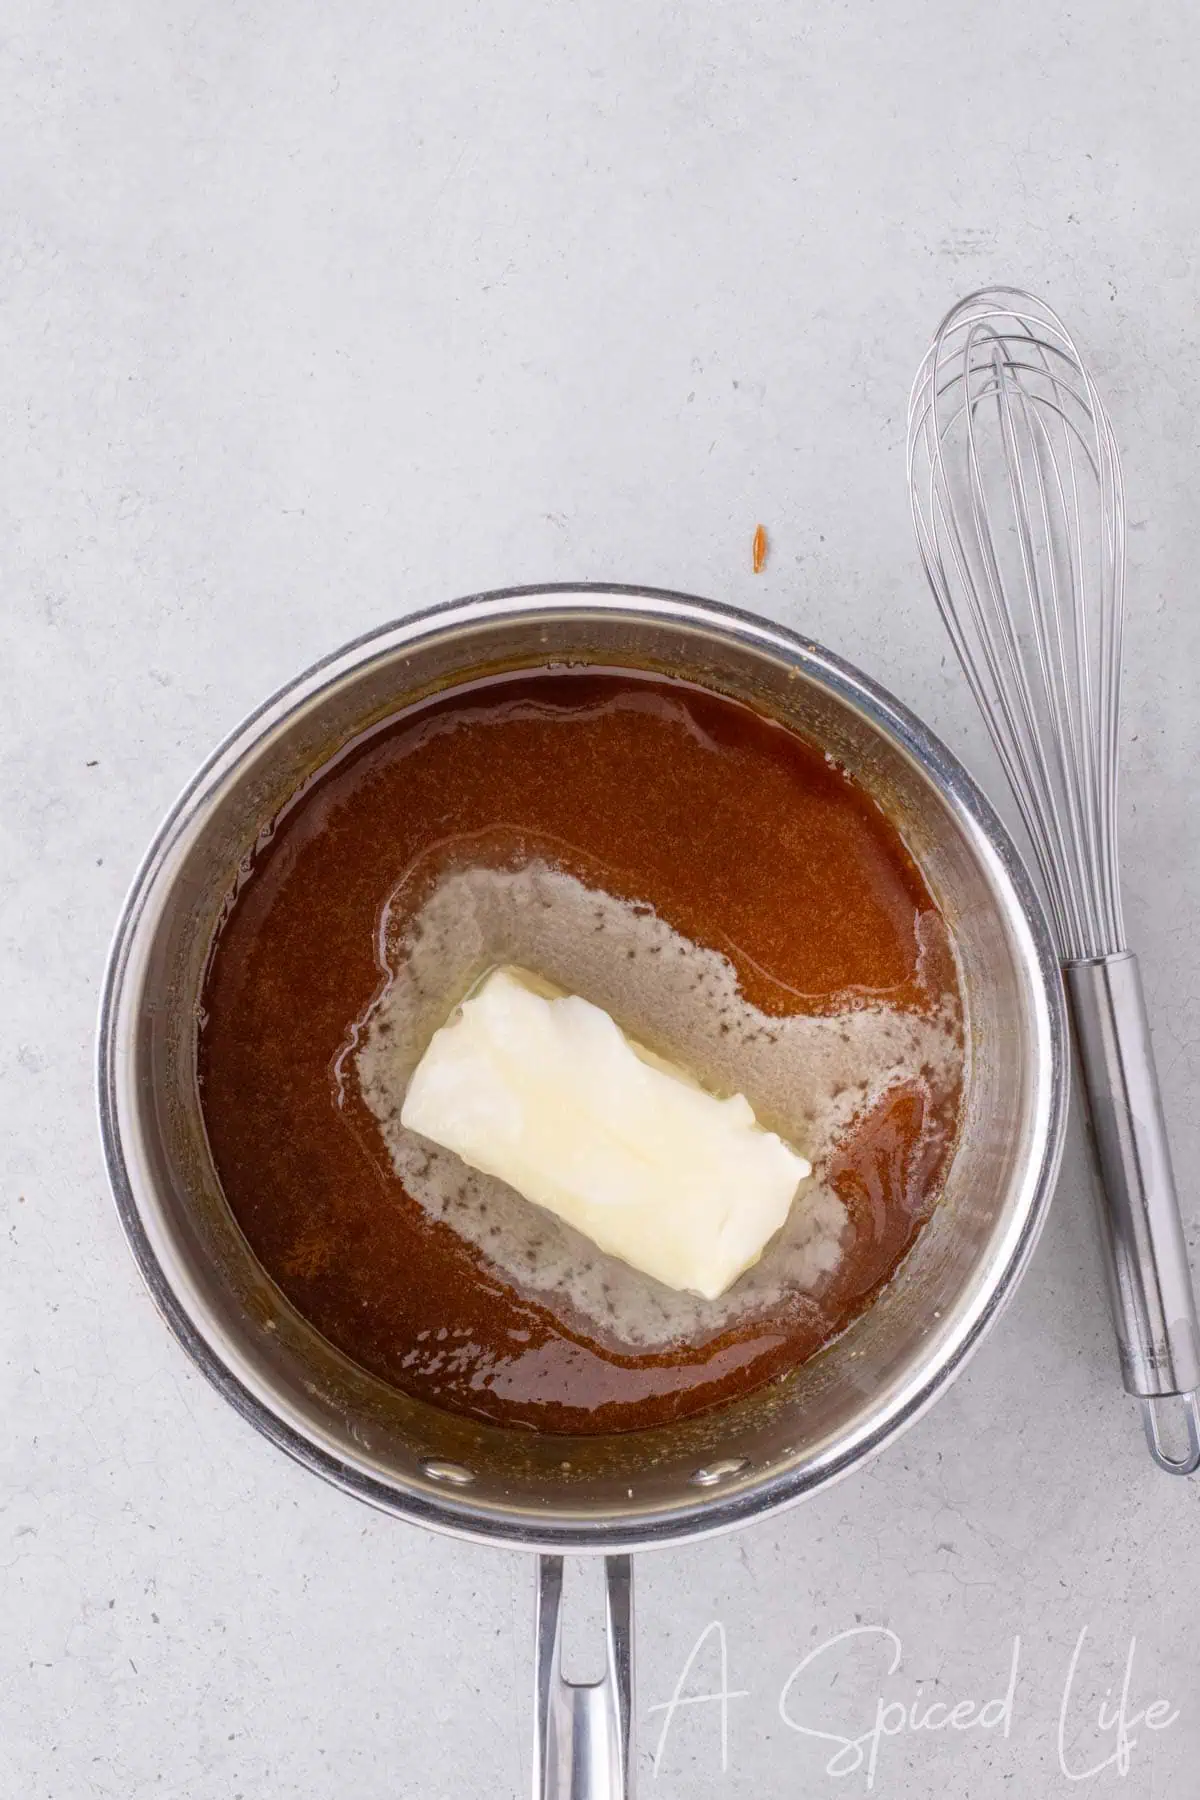
3. Add the butter to the amber colored melted sugar.
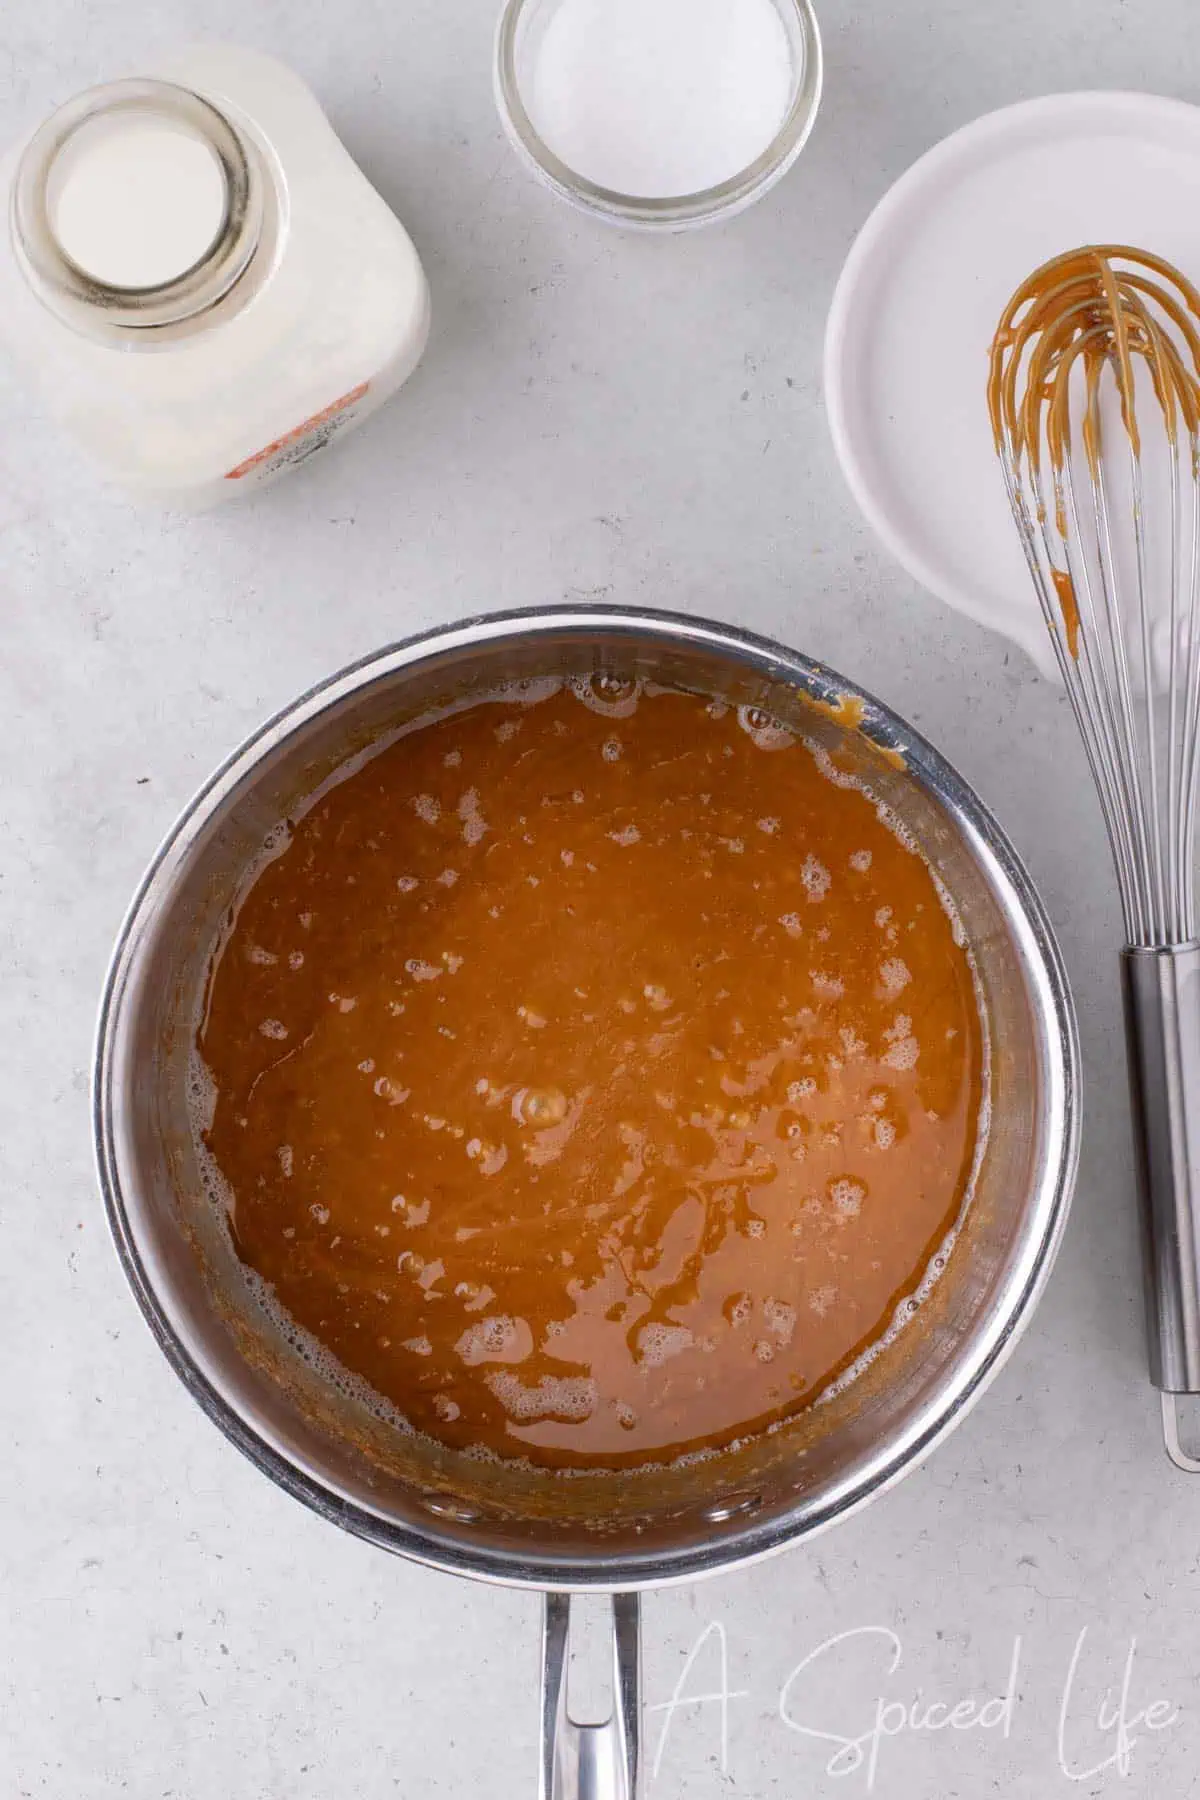


4. Whisk in the heavy cream and add the pinch of salt.
5. Simmer until the caramel begins to bubble and thicken slightly.
6. Cook to about 220°F. Let cool and pour into a heatproof container.

How To Make Salted Caramel Sauce
- Replace the unsalted butter with the same quantity of salted butter (you won’t need to add the pinch of salt).
- Don’t have salted butter? No problem, when it’s time to whisk in the heavy cream, add 1 teaspoon of salt into the mixture (instead of the pinch of salt).

Tips for the Perfect Caramel
- Use a heavy-bottomed saucepan; avoid non-stick pans, as they can cause the sugars to crystallize during melting. This is the one I used.
- Stir continuously: Don’t be tempted to let the sugar sit there and only stir every once in a while. Doing so will give you large chunks of semi-melted sugar (think candy), which will make it nearly impossible to dissolve fully and you will be left with a grainy, lumpy caramel sauce.
- Low and Slow: Don’t try to speed up the process by increasing the heat to melt the sugar faster. It burns easily, resulting in a bitter-tasting caramel. If you end up burning the sugar, it is best to discard it and start over.
- Caramel will thicken as it cools: Don’t be tempted to continue cooking the caramel because it doesn’t have the right texture; once it has cooled, it will thicken. Having an instant-read thermometer will take out all the guesswork.
- If you want to thicken the caramel to fill sandwich cookies, follow the same instructions but bring the temperature up to 235-240°F instead.
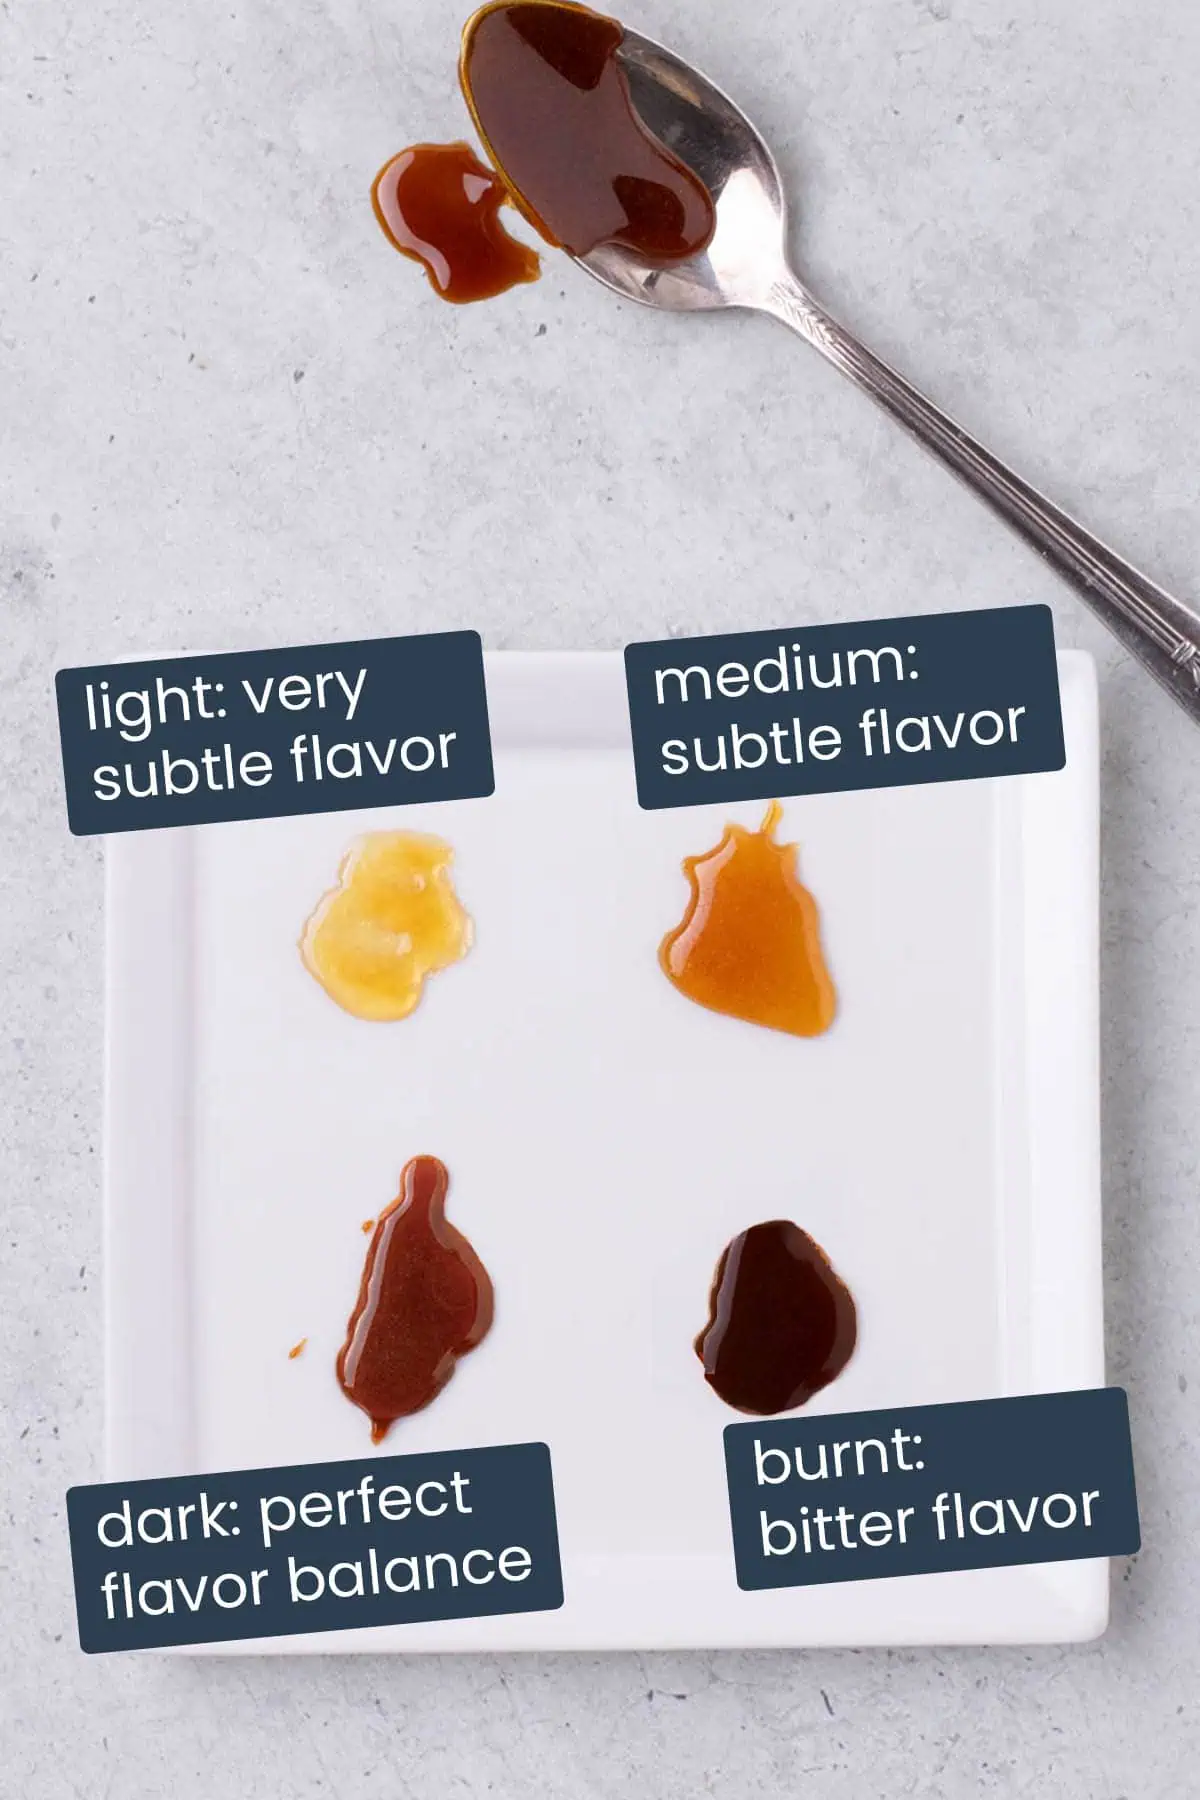
How To Tell If Your Caramel Is Ready
If you don’t have an instant-read thermometer, here is a visual guide for reference. You want to aim for a dark, ambered hue, as this will give you the most depth of flavor without reaching the bitter, burnt stage. It’s a good idea to use a light colored or stainless steel saucepan, as it makes it easier to see the actual color changes and the stage of caramelization.

Join my newsletter!
Subscribe and get a new recipe each week + my bonus guide: ‘5 Easy Baking Tips That Will Change the Way You Bake. Forever’
Storage and Reheating
Homemade caramel sauce stores well if kept sealed and refrigerated. Let the sauce cool for 5 minutes before transferring it to a heatproof jar and cover tightly. (These are the glass jars I used in my photoshoot).
- Refrigerator: Caramel sauce will keep in the fridge for up to 1 month. It will thicken as it cools, so warm it gently in the microwave before using.
- Freezer: For longer storage, freeze caramel in an airtight container for up to 3 months. Thaw overnight in the fridge, then reheat until smooth.
- Room Temperature: This recipe contains cream, so it is not shelf-stable; always refrigerate after using.
★ Pro Tip: If the sauce looks grainy after storage, whisk it while reheating to bring back its silky texture.

Homemade Caramel Sauce: FAQ’s
Yes, this caramel sauce freezes well with no changes in texture once thawed. It should be stored in an airtight container and is good for up to 3 months in the freezer.
Yes, if you would like to make a boozy caramel sauce, add 2 tablespoons of bourbon with the heavy cream and salt, and proceed as directed.
Unfortunately, once the sugar has reached the burnt stage, it is not possible to ‘fix’ it by adding more sugar. Burnt sugar develops an intense, bitter flavor, which will significantly impact the overall outcome of your caramel. It is best to discard it and start fresh. To prevent future burnt caramel mishaps, ensure your saucepan is kept on medium-low heat and keep a watchful eye on it while stirring.

Caramel Sauce (with Salted Caramel Option)
Ingredients
- 1 ⅓ cups 267g granulated sugar
- ½ cup unsalted butter room temperature
- ½ cup heavy cream room temperature
- Big pinch of salt
Instructions
- Place the sugar into a 2-quart saucepan set over medium-low heat. Using a wooden spoon, stir continuously until the sugar resembles the texture of course sand and starts to turn an even light golden color.
- Continue stirring. The sugar will start to feel heavy and begin to clump together to form larger, even shaped clumps that will start to become molten.
- Continue stirring until the sugar has melted (it should be a light amber color). You may find you need to brush the sides of the saucepan with a wet pastry brush to avoid any burning sugar on the sides of your saucepan.
- Continue cooking and stirring the melted sugar until it reaches a medium amber color, remove the saucepan from the heat and whisk in the butter until combined.
- Carefully add the heavy cream (you don’t want any burning hot caramel splashing on you) and whisk until combined. Stir in the pinch of salt.
- Return the saucepan to a medium heat setting and allow the mixture to bubble for 1 or 2 minutes or until an instant-read thermometer registers 220°F.
- Remove the pot from the heat and allow it to cool slightly before pouring it into a heatproof container.
To make salted caramel:
- Replace the unsalted butter for the same quantity of salted (you won’t need to add the pinch of salt).
Notes:

Now that you’ve mastered this homemade caramel sauce, it’s time to put it to good use. Whether you’re drizzling, dipping, or baking, these sweet recipes are the perfect next step:


I like to eat this by the spoonful…..don’t judge 🙂
I’m not sure what happened, but I ended up with a bunch of hard lumps of sugar in melted butter. What did so do wrong?
Hi Angie, I’m so sorry you ended up with clumps instead of caramel.
A few common things that can cause issues are: the heat being too high; using a heavy-bottomed pan; and stirring gently but consistently over medium-low heat really helps the sugar melt evenly without clumping. If heated too quickly and not stirred continuously, the sugar does not fully dissolve and will leave you with those big chunks.
In addition, adding the cream too quickly can make the caramel seize up.
If you tell me what happened specifically (at what stage the clumps happened, I may be able to help troubleshoot it with you!